Showing posts with label Midrealm. Show all posts

Monday, January 11, 2016

Two Ayreton Stars

The lightbox, at the moment

The muse sang so I danced. I've cut two Ayreton Populace Badges to whip out in a hurry and give to the new TE Ayreton. They aren't actually done, but I think the lessons portion is done, and there are a few lessons learned! I'm writing this up early and will follow-up with a completed picture in a day or two.

I was originally going to do one "swirl" and one "straight" but cut them both swirled, and I have no regrets. As soon as I finished cutting the first I thought those straight lines would be SO BORING and amateurish (not that anything with 12 pieces is particularly fancy!) unless I found the perfect bevels.

I cut the pieces for the first one out (the one laid out, top right corner), and set them on the pattern. And then I freaked out. They weren't fitting. AT ALL. Not even close. For a change of pace, and a bit of experiment, I decided to do these by cutting out the pattern with shears and tracing them onto the glass. How could it be that wrong?! I had a mini-meltdown via PM to Roana. THIS IS NOT WHAT I NEEDED when I am trying to rebuild a basic amount of confidence in my ability to make glass art.

After a few minutes of panicked thinking, I had an idea. It's a round pattern, right? When I began cutting it with shears, the first thing I did was cut out the circle. Maaaybe I had just rotated it in relation to the reference (unsheared) pattern. After frantic comparison, I discover it's off 30°. "4" is actually "5', and so on. WHEEEW.

So, I had to recut a blue and a green piece, since rotating them offset them by one of each color. I knocked those pieces out. Then I realized I could have just rotated my reference pattern to match the cut up one. At least I was able to laugh...

With this second one, I plan to use etching acid either in the center of the star, and drybrush it out toward the tips, or at the tips and drybrush it toward the center. If I can make it match what's in my head, it will be beautiful.

[Edit later this week with completed pictures]

The first one, completed:


Sunday, October 26, 2014

"Dogboning"

I enjoy making fused items, too. I made two plates for Their Majesties lunch at Fall Crown last weekend. I had an issue with the first one, and turned to the great people at Fused Glass Fanatics on Facebook.

The "not quite right" but serviceable plate, in the mold.

I was informed this is called "dog boning" and is the result of firing either too quickly or to too hot a temperature. After giving my firing schedule I was told the pre-set schedule I've been using goes about 100°, maybe 150°, too hot. I'm very glad to know this, and to know there is a term for it!

Purple Fret Scroll for Lady Kat the Green

A few shots from a quick scroll for Lady Kat the Green of House Dark Horse. She received a Purple Fret last weekend at Fall Crown.

Not happy with the soldering. I've been spending some time doing drills of the basics (cutting, soldering), so focus on them. I think at times I get sloppy and need to slow down, focus, and don't forget the basics when I'm thinking about flashed glasses and silver stains and so on!

Calligraphy done by THL Justice McArtain, who was trying calligraphy on glass for the first time. He had positive things to say about it and has agreed to write another scroll I have in mind.

This is also my first pattern made using Pattern Wizard. Photoshop always gives me fuzzy lines which I'm realizing hurts the accuracy of my cutting, no matter how well I think I can "see" the line anyway. I also keep doing these on short notice... all of the soldering for this scroll was done in a few hours at night after site setup and immediately before going to bed (with "sleep" the reward for finishing it... that doesn't encourage careful work, and I need to stop doing it!)


I was initially unhappy to use "gold" glass but I didn't have enough of my "lemon yellow" sheet left. I used it for the last purple fret suncatcher I made as largesse. In hindsight I think this looks infinitely better than the lemon yellow, and I love that texture (believe this is spectrum waterglass).

At the urging of friends I won't sit and do a critique of my work and the spots where I'm unhappy with the rushed and in-the-dark soldering. If you don't see them, thank you :). If you do, know that I do too :)

I also learned that this reign Their Majesties Cadogan and AnnMarie "escrowed" a copy of their signatures with the Dragon Signet for those making alternative scrolls. I think this is AWESOME. I didn't directly trace the signatures because even enlarged they appeared to have been written with the World's Smallest Calligraphy Nib so I tried to paint them in a similar hand. Seriously, if I couldn't see the varying line widths I'd swear it was a ballpoint pen, I want to see the nib used!

Lessons Learned
Don't solder or generally work on a 48-hour deadline, dang it.
Have GOOD lighting while soldering. Don't solder while your crash space-ees are trying to sleep.

Monday, September 15, 2014

ODH Scroll for Baroness Zafirah

I describe myself as the worst scribe in the Midrealm. Frankly, I don't self-identify as a scribe at all. I don't work on any kind of C&I in my free time or for enjoyment. I started taking scroll assignments in my capacity as a herald to assist the scribes when a court list came out on short notice or was larger than normal. I've made 3 or 4 paper scrolls, unhappy with any of them, before deciding that I should try and make a glass scroll and play to a strength while getting the job done.

Still, I never take assignments above the AoA level, I leave those for the practicing scribes. So when Estelle, my good friend and our chief Signet messaged me on Facebook offering a Dragon's Heart assignment I balked. Twice. She was insistent, I'd really want this one. I finally agreed and was not disappointed. But that left me needing to figure out how to make a scroll worthy of our highest service award beneath a peerage, one going to another dear friend.

I started sketching ideas on my train ride and sent her a picture. She immediately liked one of the designs so I worked on making it into a full cartoon.

It can save a lot of frustration to make the most difficult cuts first, so I started on the heart. Slowly removed the "dip" in tiny cuts until I didn't dare press my luck further:


I painted on the lines with some fear. I've made one other Dragon's Heart (a suncatcher, not a scroll) and the green glass turned from a translucent Hunter's green to an opaque green with translucent mottled spots. I had one sheet of glass and it pretty much had to work for me to be done on time.


A sheet of lined paper from my previous scroll was sitting behind the lightbox, and it came in very handy with this. Once dry I did some stickwork to clean up the lines, and fired it overnight. I was intensely relieved when the glass came out looking as it had going in.

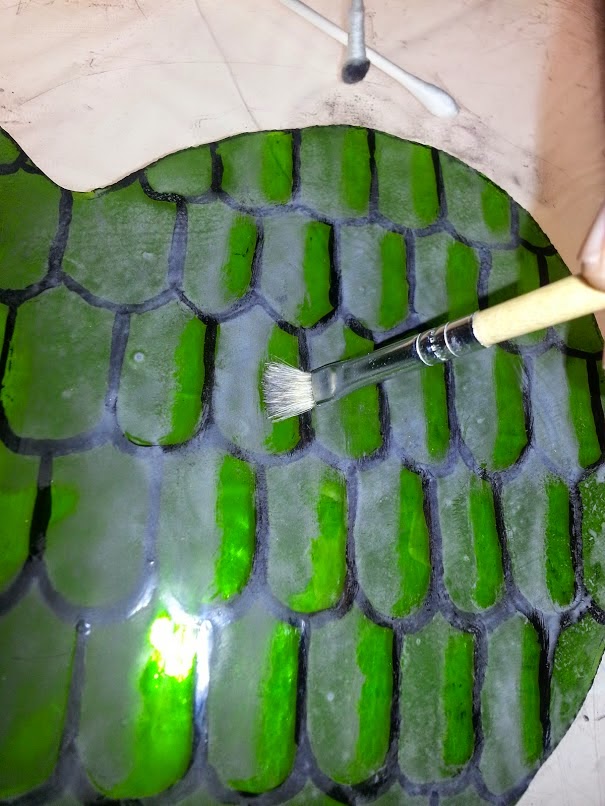
I was going to leave it alone there, as with the other heart, but I wanted to make it stand out more and thought of shading/highlighting schemes. I hastily mixed some paint, applied a mat, and tried several schemes for highlighting either the entire piece or the individual scales.


The left half is shading the entire heart (though not as gradually as I planned). The right half shows a stippled highlight, scrubbed highlight, a stickwork edge, and combinations.

I then decided this mat was a LOT heavier than I desired and redid it with something more like what I wanted in the "real" shading. My consulting scribe said she thought the scrubbed scale-by-scale highlight looked best so I did more of that on the test piece.


That being settled, I ground and remixed my paint better, and did the real thing. An observation about scrubbing is below.


The red and clear fill-in for the "inner circle" was easy and routine. I found a Spectrum Baroque sheet that had faint tan streaks and chose it for the calligraphy border for interest, rather than use more of the Foxtail sheet from the inner circle. This time I mixed up some water-based paint, after speaking with Kirsten about it, rather than the clove oil paint before. I tried the dip pen, but it fought me again. I finally tried a tiny brush from the local hobby shop, intended for painting Warhammer miniatures. I discovered that a pretty good technique could be gotten from it. A painting bridge was extremely important to this work. The calligraphy isn't great, but this time I've come away believing that with a bit of practice I could make some respectable lettering. The water-based paint made half the difference as well.

As always, click to see larger versions.


I was very unhappy with the way it looked foiled. The gaps were rather large. I suspect it's because I use photoshop to make my own patterns at times, and the lines are fuzzy. I think I'm sabotaging certain custom patterns right from the start by not having crisp cutting lines. I eventually quit trying to evenly space the pieces, and instead I pulled them closer to the center. This caused heavier lines and larger gaps between the heart and the calligraphy border, but at that point it looked symmetrical and pleasing to the eye, at least I felt so.

As the woman who taught me stained glass once remarked, "black [patina] hides all manner of sins" and once the roundel was completed I was much less upset with the finished product.


Lessons Learned
1) Water based paint
    After I made the Acorn scroll Kirsten mentioned she does her calligraphy with water-based paint for easier clean-up. I often remark that glass is a forgiving art for a shaky non-artist like myself because we can clean our lines up a fair bit. I don't have a before picture of the calligraphy for a reason, scribes would faint. I intend to use water-based paint to "calligle" going forward. I'm next going to try it with a "kistka" tool used in pysanky painting, another Kirsten recommendation.

2) Mixing from the edge.
    It's very difficult to keep a pallete of paint well-mixed with a tiny brush while writing. I found if I started aiming for the edge of the puddle it was easier. In this picture you can see the paint separating (It is my understanding the "grey" water is the gum arabic separating out). You'll notice the edges remain black. I started quickly mixing that small area when loading my brush. I can't be sure if this actually means I got very little gum into my paint, but I had no problems getting it to hold the glass until firing. 


3) Scrubbing
     I think I've remarked before that I love the look a hog bristle scrubber leaves on paint. There can be tiny lines left behind that look rather like a carved blockprint. It's an imperfection that is beautiful to me, and there are very few of those in this world. I started off using Q-tips to scrub out paint but that got messy. I switched to a bristle brush and enjoyed the look much better. The line between shading and highlighting is not as crisp and sharp but looks less amateurish to me. Unfortunately to get that effect I was very hard on the brushes, bending the bristles at the ferrule in a way you would never do a loved paintbrush.


4) Matting
     Paint does lighten-up by 20-25% after firing. The lighter matting paint I put down disappears in strong light. I took some pictures in my window, but direct light on a clear sunny day made the shading disappear totally. A cloudy day should show it as I intended, being similar to my lightbox. A darker mat (though not as dark as my first practice!) may have been better.


Thursday, June 12, 2014

SCA A&S 50 Challenge: Stained Glass Heraldry

1 - The Populace Badge of the Middle Kingdom


2 - Memorial Panel for Bryan (In progress)


 3 - Badge of THL Estelle de la Mer


4 - Cross Pattee (The badge of the Knight's Templar)


 5 - Populace Badge, Barony of White Waters, Lantern


6 - Roundel of the Arms of the Barony of White Waters


7 - Device of Alexander Adelbrecht von Markelingen


8 - House Shadow Dragon suncatcher


 9 - Vickie's device
10 - My device
11 - Ayreton Roundel
12 - Baroness' device
13 - Baroness' husband's device maybe
---
14 - Aggie's device
15 - Eadric's device
16 - Ed's device

 ---
17 - Dayle's device?
18 - Purple Fret suncatcher


19 - Estelle de la Mer Scarab Badge
20 - Dragon's heart
21 - Konrad
22 - Calybrid?
23 - Dougale
24 - N. Oaken Heraldic Display Prize - Tudor Rose Suncatcher
25 - Dr Best
26 - Savage Badge Plates
27 - Device of Konstantia Kaloethina


28 - Silver Acorn Scroll (The award badge is heraldry)
29-  Lilith Northwode

30 - Device of Mistress Elena de Vexin
31 - Device of Mistress Kirsten Thorsteinsdottir
32 - Chicago Star*


33 - ODH Scroll for Zafirah of the White Waters, Baroness White Waters


34 - Master Gailen Alric Ros
35 - Laurel Scroll for Mistress Estelle de la Mer
36 - Badge of Jean-Yves de Chierbourg
37 - Barony of Ayreton Populace Badges

38 - Barony of Shattered Crystal
39 - Archery Pheon Prizes

40 - Badge of Baroness GenRose de Glendalough 
41 - Badge or Device of Quenild of Mercia
42 - Arms of Mistress Gianetta Andreini da Vicenza
43 - Baroness Laurencia of Carlisle, OL
44 - Kendrick Cameron
45 - Petrona!
46 - Kriemhilt
47 - Catarina
48 - Crespine de la Vallee
49 - Purple Fret Scroll for Kat the Green
50 - Midrealm Plates/Bowls

* I rendered a Chicago Star in stained glass for my office. It's purely modern both in subject and construction. Still, it IS stained glass heraldry. I'm including it in the listing unless I reach 50 and have the time to substitute something I feel is more appropriate.

Thursday, May 29, 2014

A Stained Glass Scroll

I've seen a few stained glass award scrolls in recent years. Each one has been for a peerage. A recent court list came out shortly before the event and, feeling it my duty, I offered to take an assignment to help out. While thinking about the scroll design I wondered why I, the self-declared "Worst Scribe in the Midrealm" don't ever try and play to my strengths. There is no reason why a stained glass scroll could not be for a lower award, and my assignment was for an Award of the Silver Acorn (Midrealm Youth A&S award). A bit of inspiration struck me. Later, a new bit of inspiration struck me.

I manually cut out an 8" circle of clear glass. Using the knowledge Lady Moll had given me last Pennsic, I prepared a heavy matt and applied it to most of the disk. I blended it as even as I could and let it dry.

Once it dried, I laid it directly on my cartoon. Normally my patterns go beneath a thing sheet of plexiglass on my lightbox, however I've learned that even a little distance weakens the image. Placing the glass directly on the paper gives me as clear an image as possible through the matting. I grabbed a stick (specifically a bamboo skewer, I buy them 100 at a time at Walmart) and traced the outline of the white spaces.


When I mixed my matting paint I intentionally went heavy on the gum arabic. I knew I would be handling this a lot and wanted the paint to have solid grip. Unfortunately I then discovered my scrubs couldn't remove the paint. I had to spent between 90 minutes and 2 hours with my skewer in hand, scraping out the spaces. OUCH.


Once I was happy with the white space, I fired it. Fortunately it fired well! Everything looked good, so I began the part that I feared the most: the calligraphy.

I will reiterate, I am not much of a scribe. I can bumble my way through some Carolingian Miniscule or the old gothic hand they taught us in middle school art class. It's not polished and I don't use a dip pen or period inks. I only take assignments when it's an emergency (large lists/short time, etc). I don't TRY and put my terrible handwriting out into this world. Does this seem like a lot of dithering? It is, and I hope to some day be remembered for my glass work, not my scribal arts. Please forgive the atrocity you are about to witness.

Parents, cover your children's eyes. Children, get a parent who will cover your eyes.


At least Their Majesties can rest easy I won't make a profession out of forging their signatures! I suspect Estelle will tell me it's not that bad, etc etc. 

Now, for the calligraphy. I've tried in the past preparing standard water-based tracing paint and a square-shaped brush. I couldn't get anything resembling a good result. I consulted Elskus, as I often do when stumped. Around page 65 of my edition he describes sketching on glass with metal pens. I realized that I should be able to repurpose this method for calligraphy. My scribal betters may be momentarily pleased, for once I grabbed my metal-nibbed dip pen!

I put a small pile of black vitreous paint on my palette and added just enough clove oil to grind and start working the paint into a paste. Once it was well incorporated I added more clove oil until it got near the consistency of black india ink. Elskus is very clear that it must be slightly thicker than *black* india ink. Fortunately at the bottom of my scribal box I had a vial of it for reference. 

Once the clove oil ink was ready I put it into a narrow container (a plastic sake cup, specifically) into which I could dip my pen. I had a piece of paper with lines on it to place under the glass as a guide. I then went to it.

Clove oil does not spread, and is considered a "non-drying" oil. It will dry when heated, however. 

Once the second firing was finished, I applied a much lighter matt with the same paint for shading. For accents I decided to apply some silver stain to the little circles. One last firing and it is complete.


The seal was created in polymer clay by our Dragon Signet. It is intended to be hung from a hole in the scroll, however I opted to use two small soldered jump rings. My original plan was to drill the holes in the glass first, to ensure it would be safe. I forgot and jumped straight into the painting, and didn't want to risk breaking the glass at this point. I drilled one hole for the hanging jump ring. I worked some chain into it and soldered it closed.


Lessons Learned

It is essential to get the paint ground as well as possible. My palettes aren't rough enough and I didn't spend enough time grinding the paint. This lent a certain grittiness to it that made it occasionally difficult to write with. It's hard to get rough palettes without sandblasting gear, however. Hopefully I'll have that remedied before Pennsic.

I had issues with my dip pen and the little reservoir clip. Near the end I just popped it off and dipped more frequently.

Most everyone who saw it asked me why I had the "paint smear" the "smudges" or in one rare case "the shading." The 3D effect was not immediately obvious to anyone who saw the scroll. I will need to keep that in mind in the future. This was my cartoon:


You must learn to love clove oil (or aniseed oil, an alternative Elskus mentions), because you will smell it for hours, days, etc. Over this past weekend Mistress Kirsten said water-based paint will work just fine for this purpose, which would be MUCH easier to clean and correct, though at this point I might miss the clove smell!

Use a guide for scratching out the circles, they will look much smoother!

Jump rings get hot INCREDIBLY Fast. I have a ring-shaped burn on my left index finger after barely touching the ring with the soldering iron. I wonder if they are plated copper?

It was nerve wracking to take the scroll back, after the recipient and seen and held it, and tear it apart. I was afraid the stain would go wrong, the glass shatter, the drill crack it, etc etc etc. I only had a few days to make this happen, in the future I want to make sure it is completely done before it is turned in before court. The stress is not good!

Monday, March 3, 2014

Making a "minever" brush, pt. 1

[Edit, 3/3 12:45 PM. I just got a package that changed some of my information on this brush. Details tonight! In short, the quills I had were chopped before I bought them. Also, the squeezing of quills! Edit-of-the-Edit, the update can be found here!]

This was a bit off-putting.

I am, mundanely, a computer geek. I don't hunt for my food. I have two cats and a beagle. I like animals. I'm not naive, I know what tasty bacon comes from and I appreciate when hunter friends share venison with me. But I know I probably couldn't field dress an animal unless my survival depended on it. So, this ended up being a slight bit sad for me, handling little furry tails.

Cennini is the earliest primary source I have on actually making paintbrushes. Consulting a friendly C&I Laurel suggested this was fine. She said that before him no one probably thought writing it down was necessary because of the normal apprenticeship process.

The short version he detailed is you use minever fur and a tapered stick and join them using a quill as the ferrule. They are joined by some thread lashing.

He wrote that you must take the tails of minever (stoats) and remove the ends, which have the longest fur. Then take the fur from the middle. Wet them in a goblet of clean water and press them into bunches. Then you take quills of varying sizes, vulture, goose, dove, and so on. Put a bunch of fur of the appropriate size into the quill, and wrap it with silk thread*. Then, insert a small stick of wood* into the other end, and again lash it on with the thread. This yields a minever brush that he says can be trimmed into a number of shapes appropriate for different jobs.

I had to research what a minever was to understand it was a stoat. I managed to find someone selling stoat tails online, who had three of them. None of the pictures of stoats or tails had a scale reference, so I pictured something large, like a ferret or racoon tail. I was a bit surprised:

Stoat tails in a pretty standard adult male hand.

Now I see why he talked about using the tails of five or six of them for a large brush.... Heralds, do these look familiar at all? The winter coat of the stoat is called ermine. I can't imagine how many tails it took to trim a garment!

With only three tails to work with, I won't be making any large brushes. I also won't be painting any large murals, so I don't feel particularly worried about this. I plucked out a lot of the fur from the ends and middle of one tail. Wet the fur and pressed it into clumps on my table.

 Loose fur

Then I turned to my bag of quills.

I hadn't realized that very little of the quill is hollow. I cut one at the far end only to discover I wasn't putting a stick into it. The picture is not ideal, but the quill wasn't hollow at this point.


I found it a bit confusing at this point. He calls for a thin wooden stick, tapered, to be inserted and tied onto the quill and for my purposes I don't know why that is necessary. Despite Cennini's directions being in the glass section of Il Libro dell'Arte I wonder if the brushes he describe aren't used for larger paintings? He does describe a variety of sizes. Without having compared every feather type personally (vulture and dove, for example), some of the larger end seem larger than the modern brush sizes commonly recommended for glass painting by the "modern masters" and I notice a great deal of variety between the goose quills I have. At the smaller end, the feather itself seems to be a perfectly fine "stick." Their only obvious drawback is that the opposite end won't hold up for stickwork, scratching out paint as needed.

As he described, I tied the waxed silk thread on and used it in a form of lashing. He calls for a "knot" and not a "lashing" and I don't know if they would have even recognized a difference. As an Eagle Scout I know them as two different things and I was initially tempted to use a form of lashing. In hindsight, what I was going to do would have poorly secured the fur to the quill. Instead I tied a simple square knot to start. From the written description I thought the idea was to tie the thread so tightly it constricted the quill. That was NOT happening. I didn't test the strength of the thread but I attempted to tie the knot directly over the quill first and pulled tight. I got nowhere [Edit: see "**" below]. I then rechecked the text, wondering if the quills were supposed to be soaked to make them workable, but that wasn't indicated. I tried again, tying the knot directly over the fur and tightly binding the hairs into a bundle. I then wrapped my way down the bundle, over the point of the end of the quill and down. I ended with a simple overhand knot, thinking again a little wax to seal it "makes sense." I didn't use that, however, as it wasn't called for.

My first quill brush, with Cennini's book as a backdrop.


I only have a few quills that may be large enough to accommodate both the fur and a tapered stick handle. For the purposes of this small brush I have left the quill as the handle. I think the next one, which will be larger and use the tails of the other two, will have the wooden handle. Likely so too will the hog-bristle brush I plan to make tomorrow as well.

An edit will come later this month (March 2014) about the results of painting with this brush.

Thoughts and Lessons Learned (in no particular order or relevance):

  • I'm not sure why waxed silk thread was called for. Silk is known to be strong and the waxing didn't add any perceptible quality to it, though admittedly I'm not sure I've ever handled plain silk thread. It didn't seem stiffer than cotton thread. I may try to give it hell and see what happens. [**Edit: I took a length of the thread, tied an overhand knot and put it on the quill. I wrapped the long ends over my fingers and pulled slowly, but with all my might. The thread snapped LONG before the quill gave any sign of contracting neatly. I tried again with a doubled length of thread, same result. Trying on the thinnest portion did nothing that would secure bristles either]
  • What is the impact of North American vs European quills? Are geese significantly different?
  • Man, a little glue would do wonders. I'm not sure why they wouldn't have used that. Maybe glue was not as available or affordable in period? Might be another question for a C&I laurel. Mostly irrelevant, but a quick review of an episode of How It's Made shows that modern brushes are not held in using compression, but glue... at least, the large ones. [Edit: The knowledgeable and skilled Estelle de la Mer has informed me that period glues would likely have become weak quickly due to constant exposure to moisure.
  • I'm curious how the quills compare. I can't find European turtle dove feathers available, but NorAm mourning doves are. I've ordered a few. I suspect the quills will be significantly smaller. The average length of the two breeds is only a few centimeters different.
  • I will be interested to see how the hog bristle brushes turn out. The C&I Laurel friend I spoke to suggested that they are very suitable for glass painting (contrary to a remark I made) because they should apply the paint thick enough to conceal the brush strokes. To be honest I initially thought that was incorrect because we use a badger blender to smooth out those strokes. Then I realized, none of the period sources I've ever seen describe a badger blender. That is what I get for doubting her :)
*Cennini listed specifics and alternatives. Silk thread is one he specifically mentioned. "or any other good wood" is also given as an option so I didn't go to a length to acquire a specific wood.

Saturday, March 1, 2014

Willow

Two quick updates:

Tonight I was kindly given a Willow (Order of the Willow, Midrealm AoA-level Art award) in a regency court by TRHs Cameron and Amelie. This was done at Better War Through Archery, in Sternfeld, for my stained glass work. I am very moved by this.

I received my stoat tails, for making brushes. Uh... I was expecting something like a ferret tail. They are about 4" long and pinkie-finger thickness. Glad I took the last three they had! I may try to make a brush tomorrow.

Tuesday, August 13, 2013

#4: The Arms of the Barony of White Waters

So, since I've decided to combine my long-term goal of doing the Baronial arms of all 19 Midrealm baronies, and competing in A&S 50, I need to get a move on. This weekend is Swine and Roses, hosted by the Barony of the White Waters. Rather than do the devices in order of precedence, I've always planned on doing them in order of proximity to me. Having the closest ties to White Waters, and the first "deadline", they are first up.

Azure, a mullet of four points within a laurel wreath Or, a chief wavy argent.
 
Cutting the mask was a major pain in the fingers. I cut the escutcheon from blue-flashed-on-clear, and applied three stripes of Gorilla duct tape. A very thin coating of wood glue, and then my paper copy of the baronial arms. After it dried, I attacked it with an X-acto knife. Peeling the pieces out was a challenge, and today I ordered a set of steel dental picks.

Four pictures taken while removing the mask:


The acid etching began last night [8/13/13]. The panel needs to be completed for submission at S&R on the 17th.

[Edit 8/19/13]

The acid etching wasn't going quite fast enough. I realized the panel would probably be done Sunday, but I needed it Friday evening to stain. Mistress Kirsten shared with me a copy of her documentation a few years ago, and while I don't have her sources, yet, I know from her that abrasion is a period way to remove flashed glass. I've manually removed flashed glass with an "engraving point" for my dremel, and it's a very slow process. It's not well-suited for the space I needed to clear and the time I had. I did this with my dremel on a low speed:


It's very pretty, and the glass was left with a nice texture. I started to silver stain it, and had a problem. Due to the detail level it became very hard to remove excess stain after I blended it. It would probably have been much easier if I had waited until the stain dried and could have scratched it out. I was working with Q-tips, paper tower etc. and found it almost impossible. I removed too much frequently, trying to clean up the stem:


It was 3 AM and I needed sleep, so I gave up on the idea of entering it at Swine and Roses. On my drive there the idea occurred to me to fire it in three stages. Once for the mullet (4-pointed star) and the stem of the laurel wreath, once for half of the leaves, and once for the other half of the leaves. This would let me have plenty of wiggle room to clean up and detail the stain after blending. I'm not sure whether the results would be better when compared to waiting for it to dry and scraping it with a stick. That may require some experimentation.

[Edit 6/12/14]
Yow! I never updated this post. Here is the roundel >.<