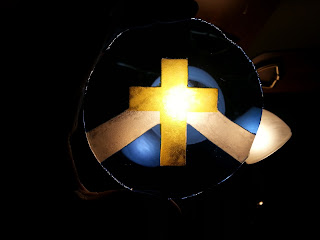
It took a dozen tests to get everything settled, to get a method to create two armorial disks. The disks are bearing the arms of a departed friend, blazoned "Azure, a chevron argent, overall a Latin cross Or." One will go into a panel for A&S. One will be attached to the lid of the handmade box containing his ashes.
I ordered two square feet of flashed glass, blue-on-clear. I also had a small (7x7") scrap of blue I found on a fluke at a local shop that doesn't normally carry flashed. I placed that into my Morton circle cutter and popped out a perfect disk. For the second disk, I cut one of the new sheets up. Popped it into my circle cutter, and met with heartbreaking (and expensive) disaster as the disk mis-cut. A second square became two more half-circles. Then a third. I blew through $75 worth of glass in an hour. I decided to forgo the fancy circle cutter and do it slowly, by hand and grinder.
Not too bad. Then, on to the acid etching. Resists/masks have been a problem for me, after several tests. Duct tape (fuzzy edge), contact paper (very fuzzy edge), and a resist gel were tried and found problematic. Most of the "tape" solutions I was trying are actually suggested for sandblasting flashed glass, not acid-etching it. I tried them anyway, because I had no better ideas and I'm not yet equipped for sandblasting. The gel was especially tricky because after I smeared a coat on the glass, I needed a "resist resist" to keep clear my target pattern. I laid down duct tape first, and lifted it to try and leave behind what I needed, but the lines weren't clear enough for my taste.
I ended up going back to duct tape, figuring I'd rather have a roundel with slightly fuzzy edges than none at all. I wanted a wider roll, however, to avoid issues where two pieces of tape match. A trip to the hardware store turned up a 4" wide roll of Gorilla-brand tape... and this stuff is mighty. I put a strip of Gorilla tape mostly across where the design will be, and two extra strips above and beneath. I then covered the gaps with two more thin strips, trying to get as much coverage as possible. I put a copy of the roundel on top with white glue, attacked it with an X-Acto knife, and got something workable.
Then, began the cycles of acid etching cream. Five of them, I do believe, in all. Sitting on scrap mirror for protective purposes:
After two coats, I believe:
Three coats:
After four:
I was shocked but pleased with the result. I gave it a fifth coat to clear up the edges. The glass is a lot clearer than I expected, more so than with sandblasting. While washing it in the end the water filled in the pits and made it completely clear.
The Gorilla tape worked far, far better than I had hoped. It stood up to wirebrushing to remove dried coats of acid etch, and kept the fine points intact. Here is a shot on top of my ancient crown template, for visibility.
Now knowing how to get the silver stain to work, I applied my stain and fired it.
I am exceedingly pleased with the result!!! Now, to get it into a panel....


(1).jpg)

Thank you for the link. Your work is beautiful and I appreciate the information and tips about how to use etching cream successfully.
ReplyDeleteMarian